


In the ever-evolving landscape of cloud computing, automation has become an indispensable tool for managing infrastructure efficiently and effectively. One of the key services that exemplifies this capability is Amazon EC2 (Elastic Compute Cloud), offering a robust platform for deploying virtual servers on-demand. Let's delve into the world of EC2 automation and explore how it can streamline your operations.
⚙ Automation in EC2:
Amazon EC2 or Amazon Elastic Compute Cloud can give you secure, reliable, high-performance, and cost-effective computing infrastructure to meet demanding business needs.
📃 Launch template in AWS EC2:
You can make a launch template with the configuration information you need to start an instance. You can save launch parameters in launch templates so you don't have to type them in every time you start a new instance.
For example, a launch template can have the AMI ID, instance type, and network settings that you usually use to launch instances.
You can tell the Amazon EC2 console to use a certain launch template when you start an instance.
Amazon EC2 Launch Templates are a powerful feature within Amazon Web Services, designed to simplify and standardize the process of launching EC2 instances.
They provide a convenient way to automate the configuration of instances, making it easier to maintain consistency and enhance efficiency across your infrastructure.
A Launch Template is a configuration blueprint that contains settings for launching EC2 instances, such as the AMI, instance type, security groups, and storage configurations.
✅ Advantages of Launch Templates
Consistency: Ensures consistent configurations across instances, reducing the risk of misconfigurations and errors.
Simplifies Management: Simplifies the process of launching instances by encapsulating all necessary configurations in a single template.
Versioning: Supports versioning, allowing you to manage different iterations of launch configurations over time.
Flexibility: Enables parameterization, allowing you to customize specific attributes when launching instances based on the template.
Integration with Auto Scaling: Launch Templates seamlessly integrate with Auto Scaling groups, ensuring newly launched instances adhere to defined configurations.
✏️ Instance Types
When you launch an instance, the instance type that you specify determines the hardware of the host computer used for your instance.
Instance types are named based on their family, generation, additional capabilities, and size.
The first position of the instance type name indicates the instance family, for example
t.The second position indicates the instance generation, for example
2.The remaining letters before the period indicate additional capabilities, such as instance store volumes.
After the period (
.) is the instance size, which is either a number followed by size, such asnano,micro,9xlarge, ormetalfor bare metal instances.
✍ AWS Instance Type
Here are some instance types provided by AWS
General purpose instances
General purpose instances provide a balance of compute, memory, and networking resources, and can be used for a wide range of workloads.
These instances are ideally suited for scale-out workloads that are supported by the Arm ecosystem. These instances are well-suited for the
Web servers,Containerized microservices.Examples:
t3, m5
Compute-optimized instances
Compute-optimized instances are ideal for compute-bound applications that benefit from high-performance processors.
These instances are well suited for the
Batch processing workloads,Media transcoding,High-performance web servers,High-performance computing (HPC),Scientific modeling,Dedicated gaming servers and ad serving engines,Machine learning inferenceand othercompute-intensive applications.Examples:
c5
Memory optimized instances
Memory optimized instances are designed to deliver fast performance for workloads that process large data sets in memory.
These instances are well suited for the
High-performance, including relational MySQL and NoSQL, for example MongoDB and Cassandra databases,Applications performing real-time processing of big unstructured data, using Hadoop and Spark clusters.Examples:
r5
Storage optimized instances
Storage optimized instances are designed for workloads that require high, sequential read and write access to very large data sets on local storage.
They are optimized to deliver tens of thousands of low-latency, random I/O operations per second (IOPS) to applications.
These instances are well suited for the
Massive parallel processing (MPP) data warehouse,MapReduce and Hadoop distributed computing,Log or data processing applications.Examples:
i3, d2.
GPU Instances
GPU instances are equipped with powerful graphics processing units (GPUs) that accelerate applications requiring parallel processing and high-performance computing.
They are used for machine learning, deep learning, video rendering, and other GPU-intensive workloads.
Examples:
p3, g4.
🙎🏻 AMI(Amazon Machin Image)
An Amazon Machine Image (AMI) is an image that AWS supports and keeps up to date.
It contains the information needed to start an instance. When you launch an instance, you must choose an AMI.
When you need multiple instances with the same configuration, you can launch them from a single AMI.
AMIs are available as Amazon-provided AMIs, AWS Marketplace AMIs, and Custom AMIs.
An AMI includes Root Volume, Instance Configuration, Permissions, Block Device Mappings, and Launch Permissions.
👨🏼💻 Task: 1
Create a launch template with
Amazon Linux 2 AMIandt2.microinstance type withJenkins and Dockersetup (You can use the Day-39 Part-1:☁Amazon EC2 User-Data🤵🏻📑 )User data script for installing the required tools.Create 3 Instances using Launch Template, there must be an option that shows the number of instances to be launched, can you find it? :)
Create Launch Template:
Go to
AWS management console>go to Instance Service> Under Instance >Click on Launch Templete>Click on Create launch template.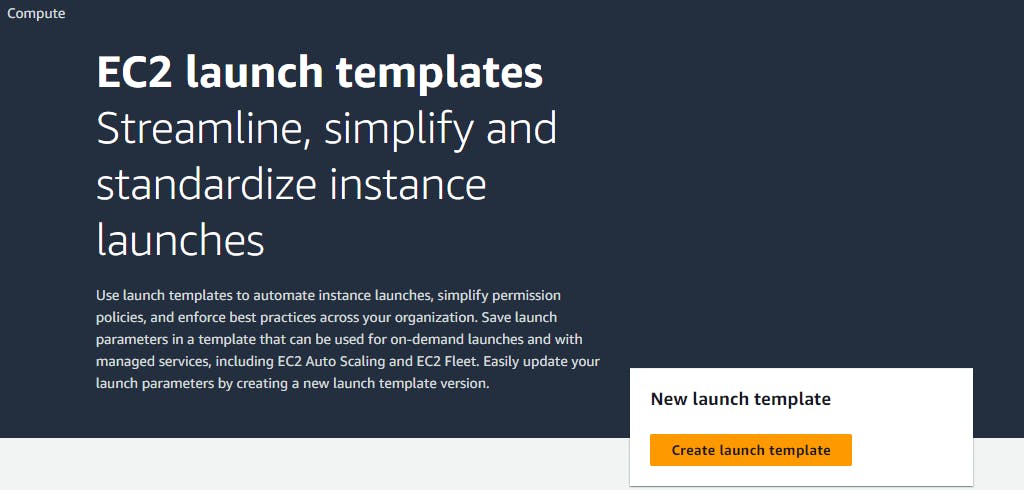
In the
Launch template name and descriptionProvide the information as per your need.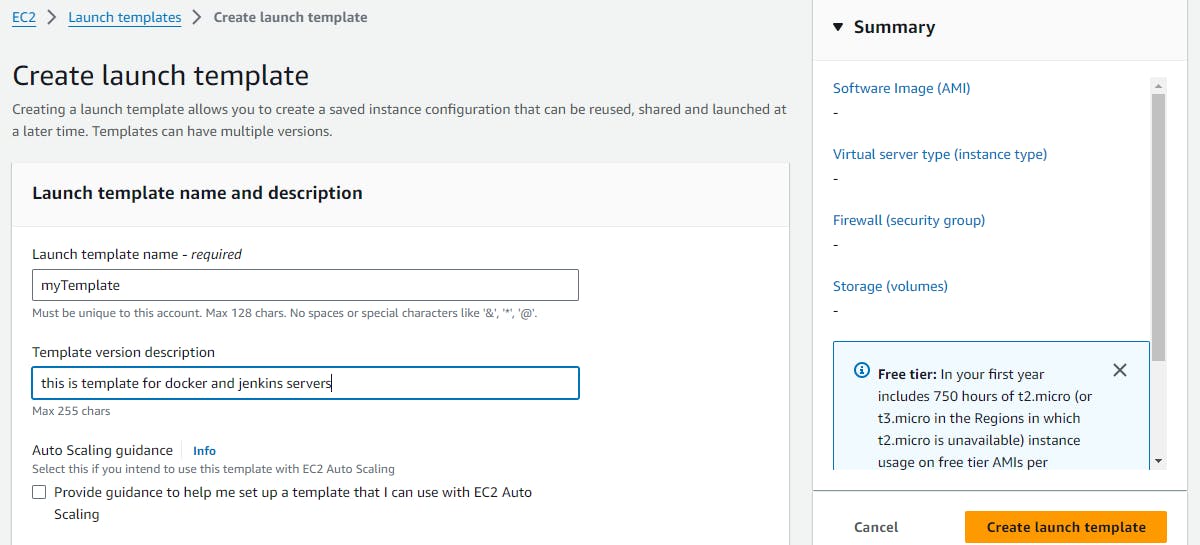
In the
Application and OS Images (Amazon Machine Image)select the image that you want.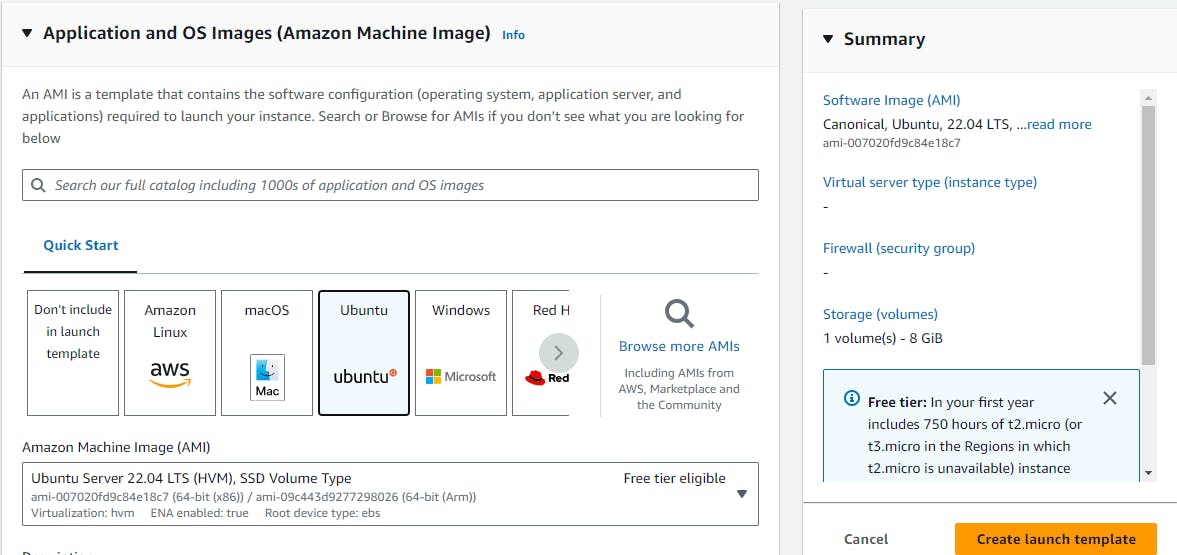
In the
Instance typeselect its free tier eligible but you can select as your needIn the
Key pair (login)existing if exists or you can create a new key.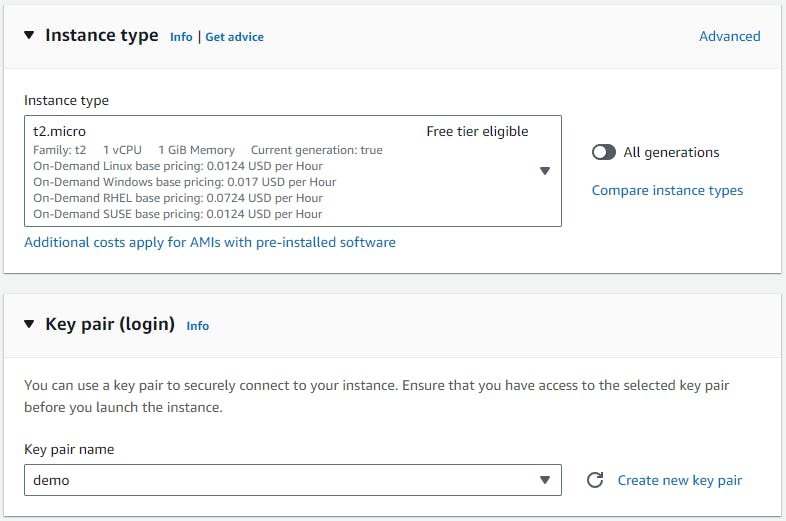
In the
Network settingsyou can select a subnet and security group if exist or you can create a new SG.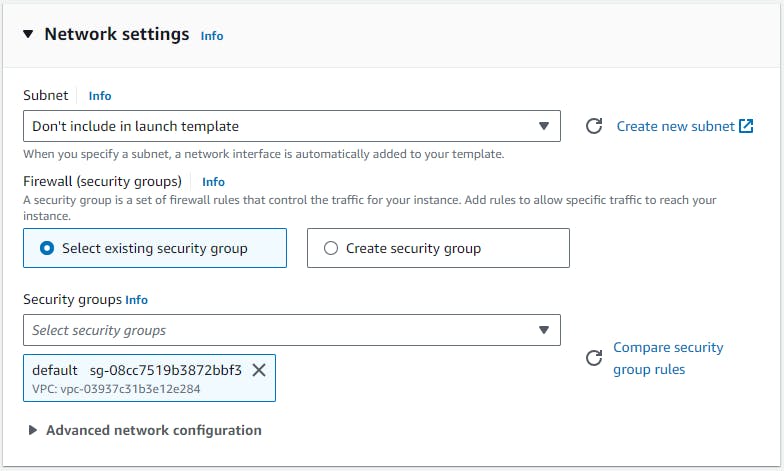
You can provide other information which needed
Now under
Advance Detailsat the bottom, there is aUser data sectionadd theuser data scriptthere, AndClick on Launch templete.#!/bin/bash sudo apt-get update -y sudo apt install openjdk-11-jre -y curl -fsSL https://pkg.jenkins.io/debian-stable/jenkins.io-2023.key | sudo tee \ /usr/share/keyrings/jenkins-keyring.asc > /dev/null echo deb [signed-by=/usr/share/keyrings/jenkins-keyring.asc] \ https://pkg.jenkins.io/debian-stable binary/ | sudo tee \ /etc/apt/sources.list.d/jenkins.list > /dev/null sudo apt-get update sudo apt-get install jenkins -y sudo systemctl enable jenkins sudo systemctl start jenkins sudo apt-get update sudo apt-get install docker.io -y sudo systemctl start docker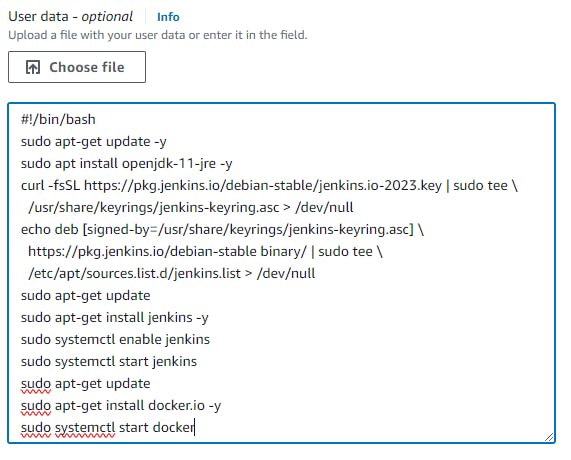
You can see the Launch Template is created.
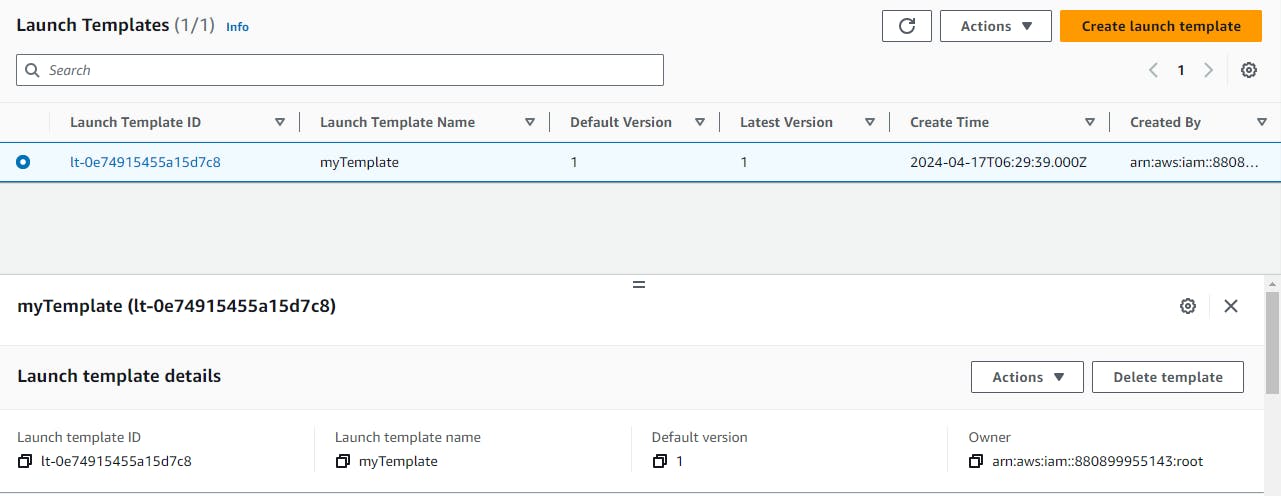
Create Instance using Launch Template:
Since we need 3 instances from the template we created,
select the Launch template>go to Action>Select Launch instance from launch template.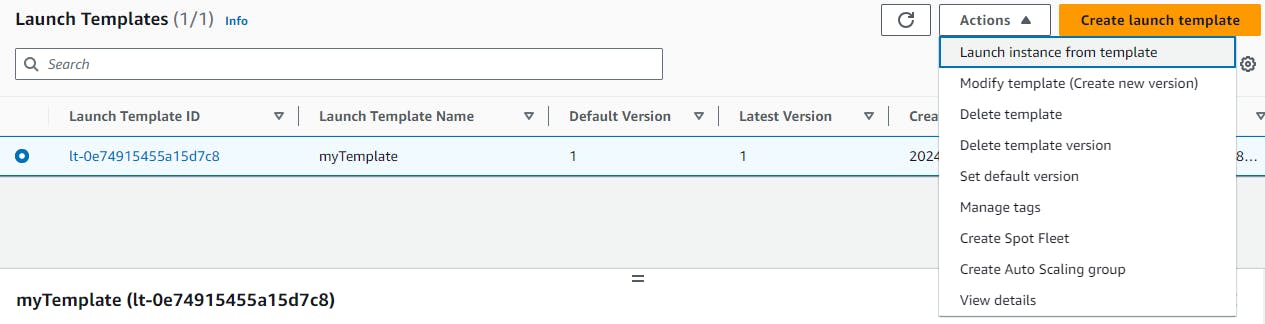
On the left side, you can see all the instance required information is available as a configuration which we have configured in the launch template.
Now, on the right side in
Summary> provide theNumber of Instances>Click on Launch instance. It will create 3 Instances using the Launch Template.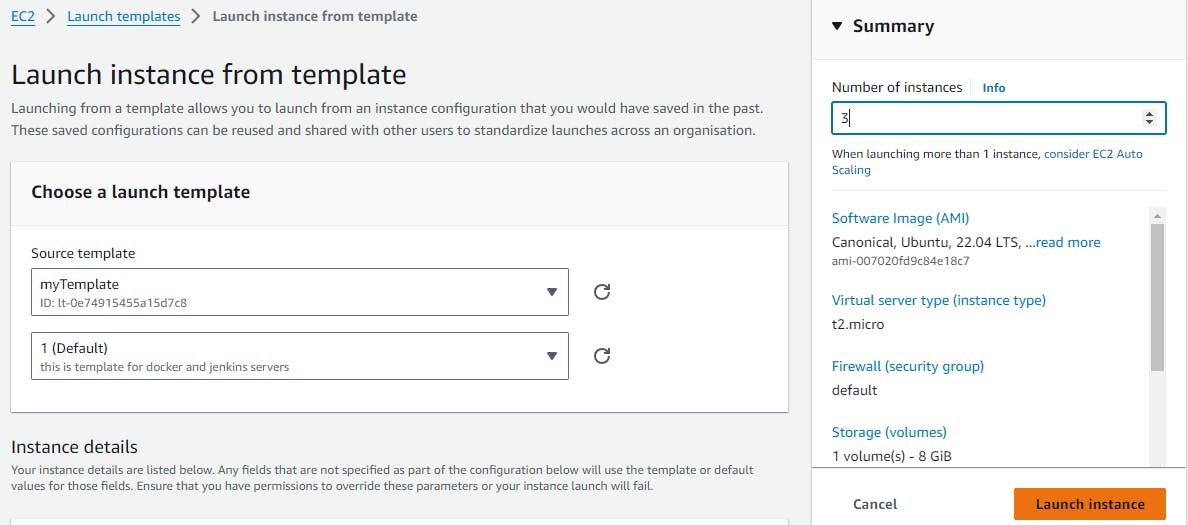
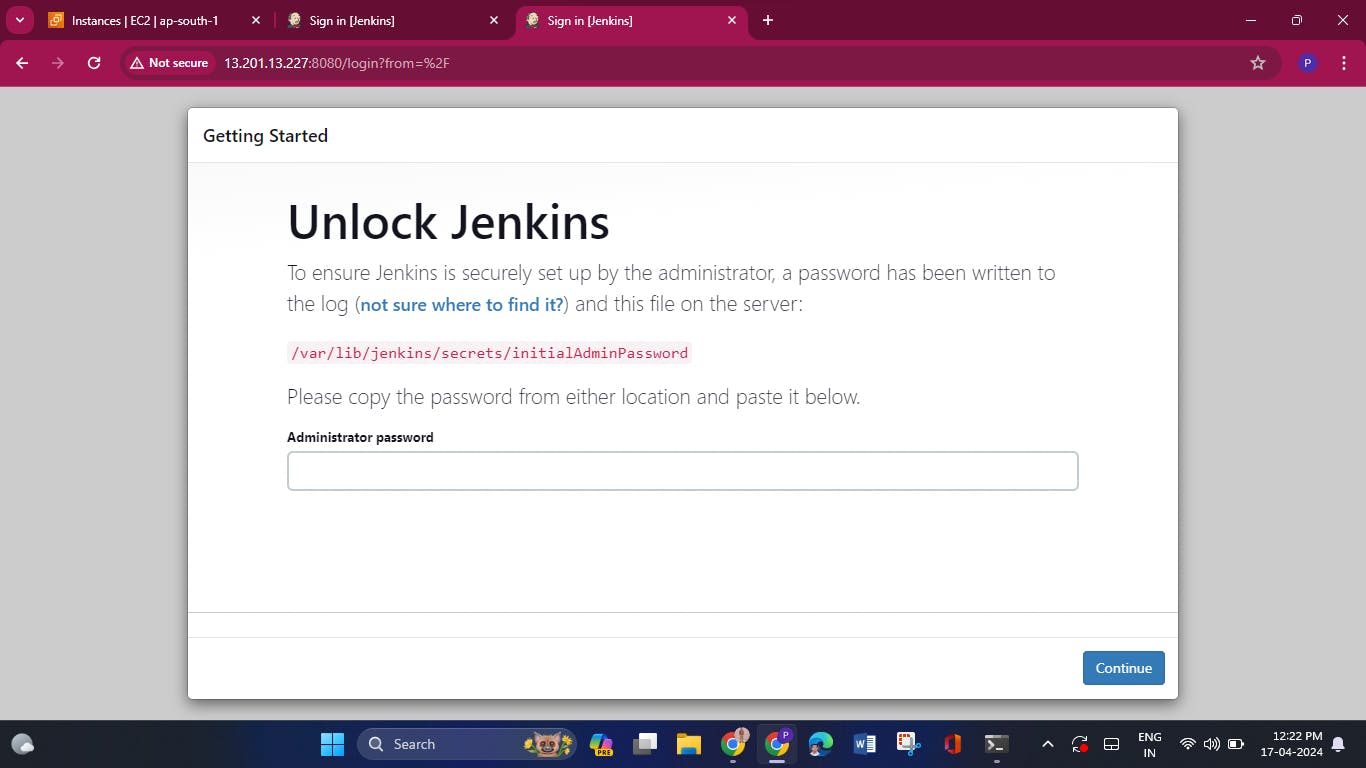
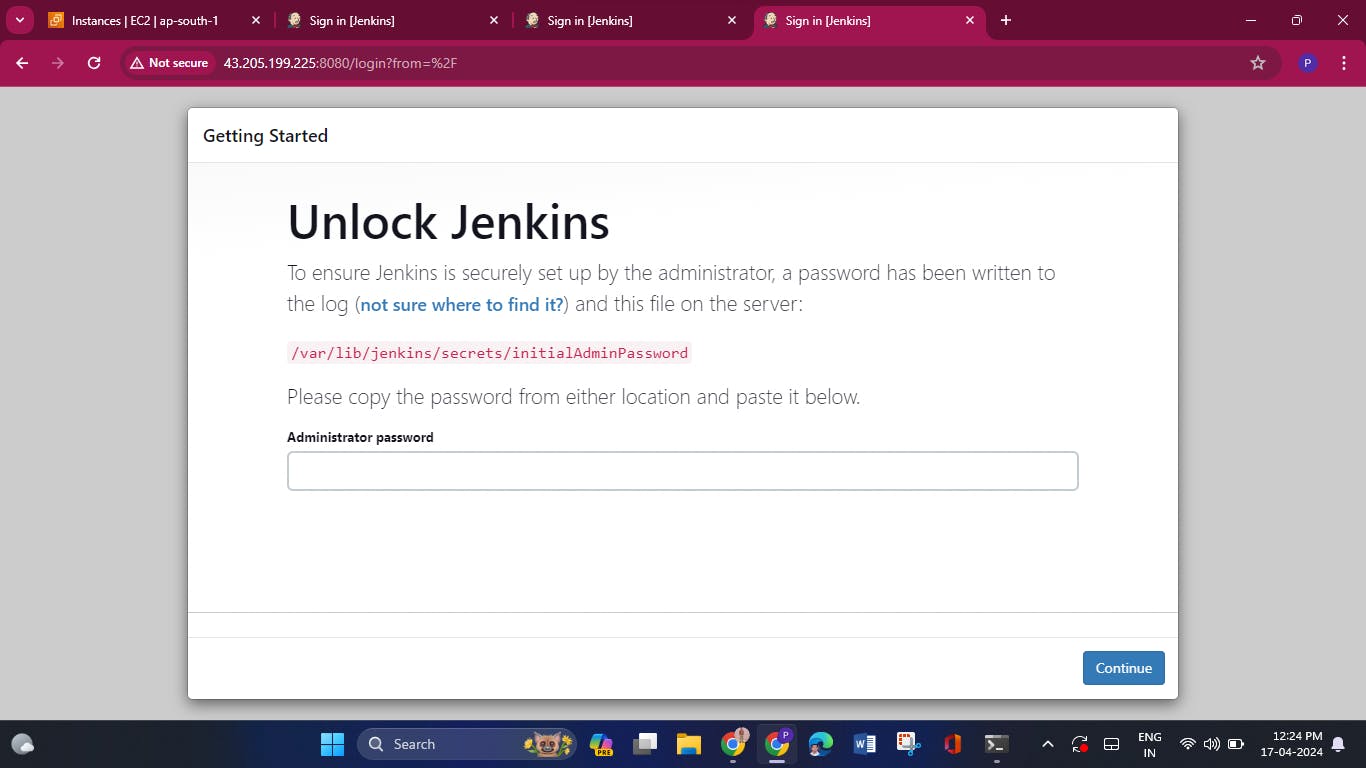
Once you click on 3 instances are created using
Launch Template configuration.Verify all the instance runs the Jenkins:
Copy all 3 instances public
IP addressone by one and paste them into the browser followed by port 8080 like<IP-address>:8080.
🔢 Auto Scaling Group(ASG)
In cloud computing,
flexibilityandscalabilityare paramount. AWS Auto Scaling Groups emerge as the magical wands, ensuring your applications gracefully handle varying workloads.Auto Scaling Groups (ASG)contains a collection of EC2 instances that are treated as a group for the purpose of automatic scaling and management.Scaling outis when weadd the server,scaling inis when weremove a server, andscaling upis when weincrease the size of an instance.
🤔 Why We Use AWS Auto Scaling Groups? 🌪️
Dynamic Workloads: Applications experience fluctuating traffic. Auto Scaling Groups adapt to changing demands, ensuring you always have the right number of instances.
High Availability: Enhances fault tolerance by distributing instances across multiple Availability Zones (AZs), guaranteeing continuity even during failures.
Cost Efficiency: Scales up during peak periods and down during lulls, optimizing costs by utilizing resources only when needed.
Automated Management: Automates the provisioning and termination of instances based on user-defined policies, eliminating manual intervention.
Improved Performance: Maintains performance levels by distributing traffic evenly among instances, preventing overloads.
🎯 Features of AWS Auto Scaling Groups
Scaling Policies: Define policies to automatically add or remove instances based on metrics like CPU utilization, network traffic, or custom application metrics.
Health Checks: Auto Scaling Groups monitor instance health and replace unhealthy instances, ensuring robustness and availability.
Lifecycle Hooks: Allows you to perform custom actions when instances launch or terminate, enabling tailored setup procedures.
Integration with Load Balancers: Seamlessly integrates with Elastic Load Balancers, enabling balanced distribution of incoming traffic across instances.
Scheduled Scaling: Schedule changes to Auto Scaling Group capacity, allowing predictable scaling for planned events or recurring schedules.
🛒 Use case of ASG:- E-Commerce Website Scaling 🛒
Imagine you run an e-commerce website. Here's how Auto Scaling Groups come to your aid:
Morning Rush: As customers flock to your website in the morning, Auto Scaling detects the increased traffic and automatically launches additional instances to handle the load.
Flash Sale: During a flash sale event, traffic spikes dramatically. Auto Scaling ensures your website stays responsive by rapidly adding instances to cater to the surge.
Nighttime down: As the night falls and traffic goes down, Auto Scaling scales down, terminating unnecessary instances to save costs while maintaining a minimal, efficient setup.
👨🏼💻 Task: 2
Create an
Auto-scaling groupusing an earlier createdlaunch templatespecify the required information, and specify theDesired capacity 1,Max capacity 3andMin capacity 1Once ASG is created verify the ASG has maintained its
Desired capacity 1or not means 1 instance should created using ASG.
Create Auto-scaling group(ASG):
Go to the AWS management console on the left side at the bottom and
Click onAuto Scaling Groups> andClick on Create Auto Scaling group.
In the
Nameprovide the name, in theLaunch templateselect created or create new andClick on Next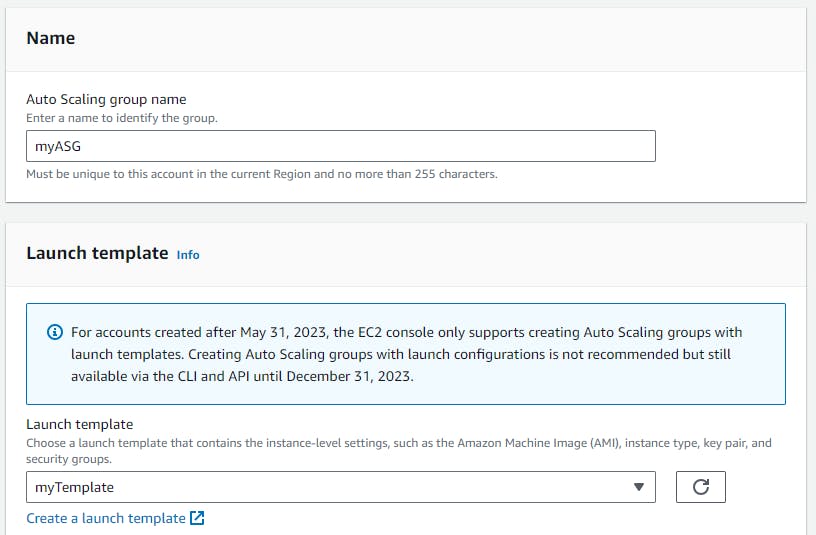
In the
Networkselect if you have your VPC created or keep it as it is, InAvailability Zones and subnetsselect as per your wish andClick on Next.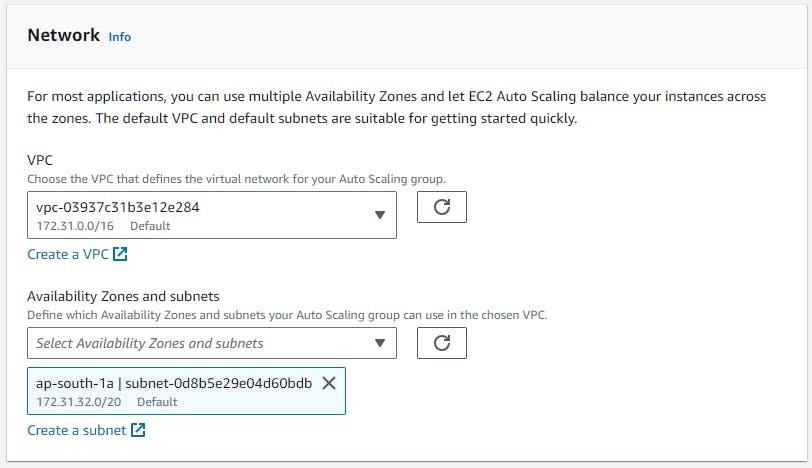
On the next page in the
Load balancingkeepNo load balancerfor now. Keep the remaining configuration as it is andClick on Next.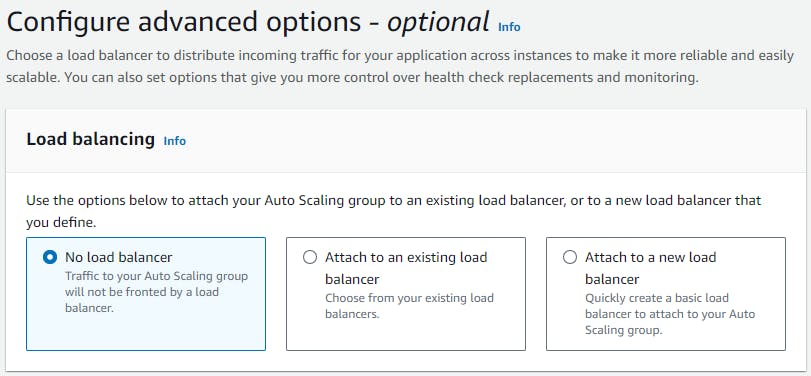
On the next page in the
Configure group size and scaling policiesset theDesired capacity is 1,Minimum capacity is 1,Maximum capacity is 3keep the remaining configuration as it is and
Click on Next.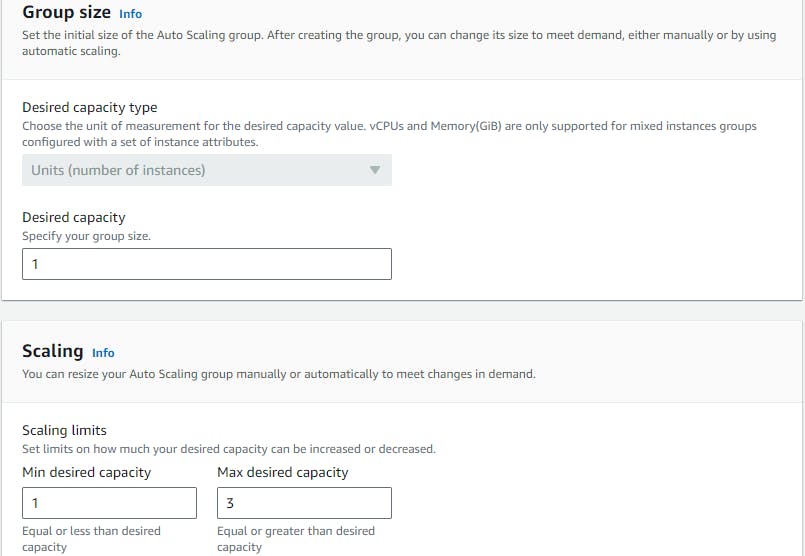
On the next page in
Add notifications - optionaldo not add the notification directlyClick on Next.On the next page in
Add tagsadd if you want to add tags to the ASG. andClick on Next.On the next page Review your configuration and
Click on Create Auto Scaling group.Verify the ASG & EC2 Instance:
You can see as soon as ASG created,
1 EC2 Instance is also created because ASG maintain its desired state 1.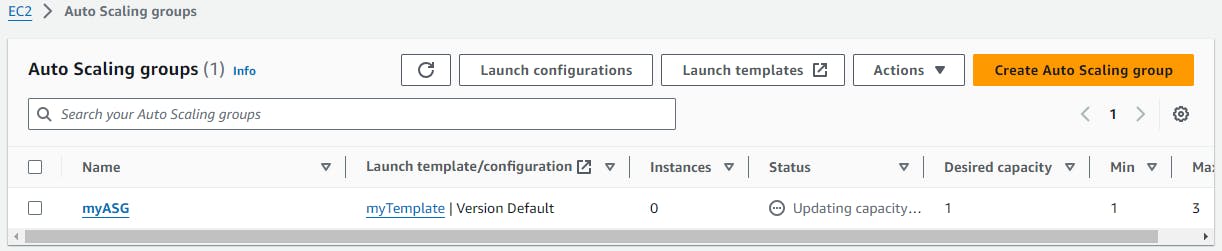

Delete ASG & Verify EC2 Instance:
Once you
delete the ASG, therunning instances will also get terminated.Go to ASG>Select the ASG>go to Action>Click on Delete> Confirm the deletion andClick on delete.
Conclusion
Automation in AWS EC2 empowers organizations to deploy, manage, and scale their infrastructure efficiently. By leveraging launch templates, diverse instance types, and AMIs, coupled with automation tools like user data scripts, you can streamline operations and focus on innovation rather than repetitive tasks. Embracing automation not only enhances productivity but also lays the foundation for a resilient and agile cloud infrastructure.
I'm confident that this article will prove to be valuable, helping you discover new insights and learn something enriching .
thank you : )