Day 39 : AWS and IAM Basics☁

In the realm of cloud computing, Amazon Web Services (AWS) stands out as a titan, offering a plethora of services and tools to cater to various needs. From fledgling enthusiasts to seasoned professionals, AWS provides a playground through its free tier, allowing users to dive into hands-on learning experiences. Today, we delve into two fundamental pillars of AWS: User Data and Identity and Access Management (IAM).
User Data in AWS:
When you launch an instance in Amazon EC2, you have the option of passing user data to the instance that can be used to perform common automated configuration tasks and even run scripts after the instance starts. You can pass two types of user data to Amazon EC2: shell scripts and cloud-init directives.
You can also pass this data into the launch instance wizard as plain text, as a file (this is useful for launching instances using the command line tools), or as base64-encoded text (for API calls).
This will save time and manual effort everytime you launch an instance and want to install any application on it like apache, docker, Jenkins etc
IAM:
AWS Identity and Access Management (IAM) is a web service that helps you securely control access to AWS resources. With IAM, you can centrally manage permissions that control which AWS resources users can access. You use IAM to control who is authenticated (signed in) and authorized (has permissions) to use resources.
Now, let's embark on a hands-on journey to solidify these concepts further.
Task1:
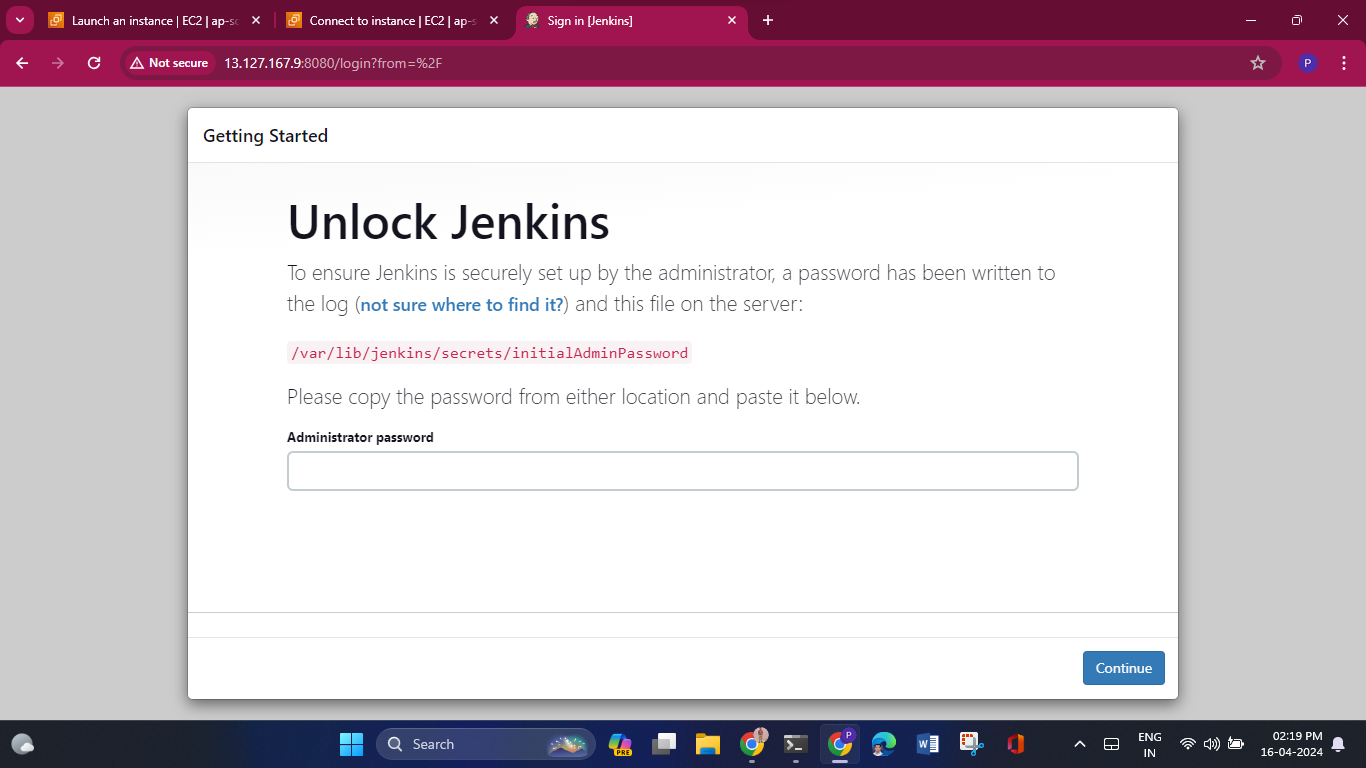
Launch EC2 instance with already installed Jenkins on it. Once server shows up in console, hit the IP address in browser and you Jenkins page should be visible.
Take screenshot of Userdata and Jenkins page, this will verify the task completion.
Go to “EC2 home page”. Select “Instances” on the left menu and click on “Launch Instance”.
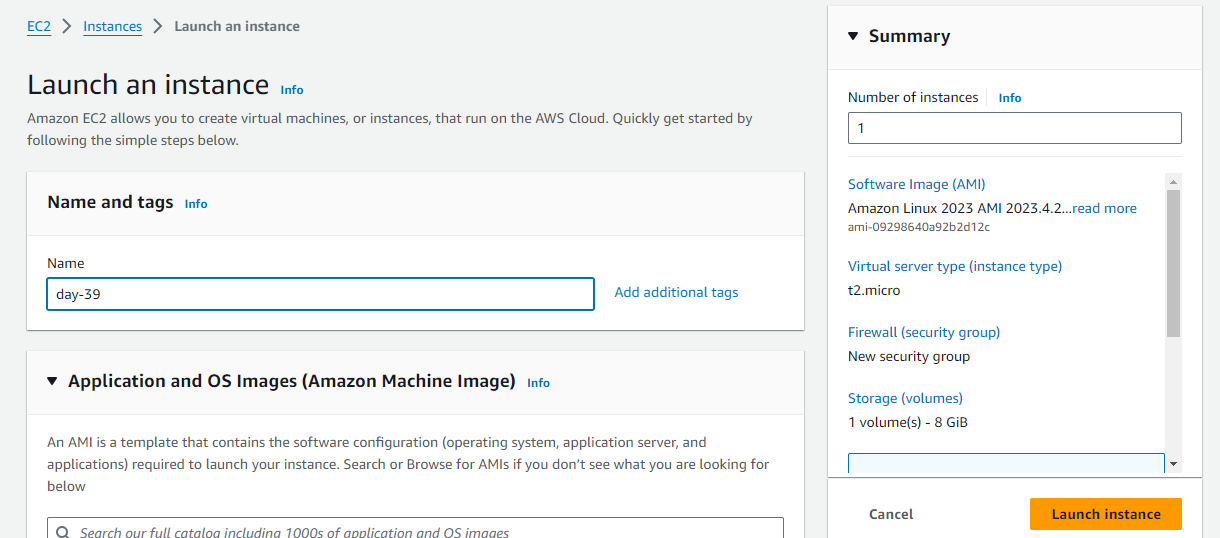
Enter the necessary details. Under User data, enter the shell script required to install Jenkins.
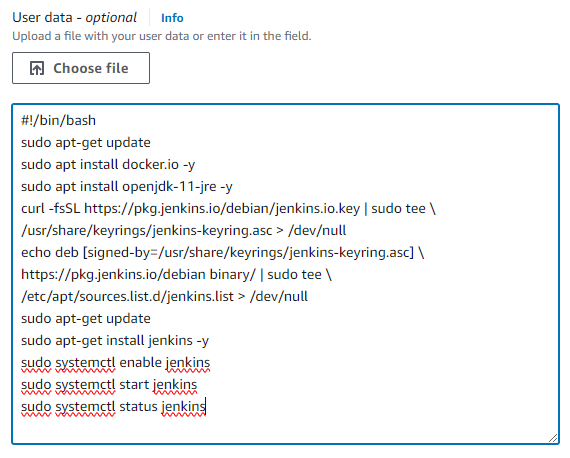
 #!/bin/bash
 sudo apt-get update
 sudo apt install docker.io -y
 sudo apt install openjdk-11-jre -y
 curl -fsSL https://pkg.jenkins.io/debian/jenkins.io-2023.key | sudo tee \
     /usr/share/keyrings/jenkins-keyring.asc > /dev/null
 echo deb [signed-by=/usr/share/keyrings/jenkins-keyring.asc] \
     https://pkg.jenkins.io/debian binary/ | sudo tee \
     /etc/apt/sources.list.d/jenkins.list > /dev/null
 sudo apt-get update
 sudo apt-get install -y jenkins
 sudo systemctl enable jenkins
 sudo systemctl start jenkins
 sudo systemctl status jenkins
Click on “Launch instance” button.
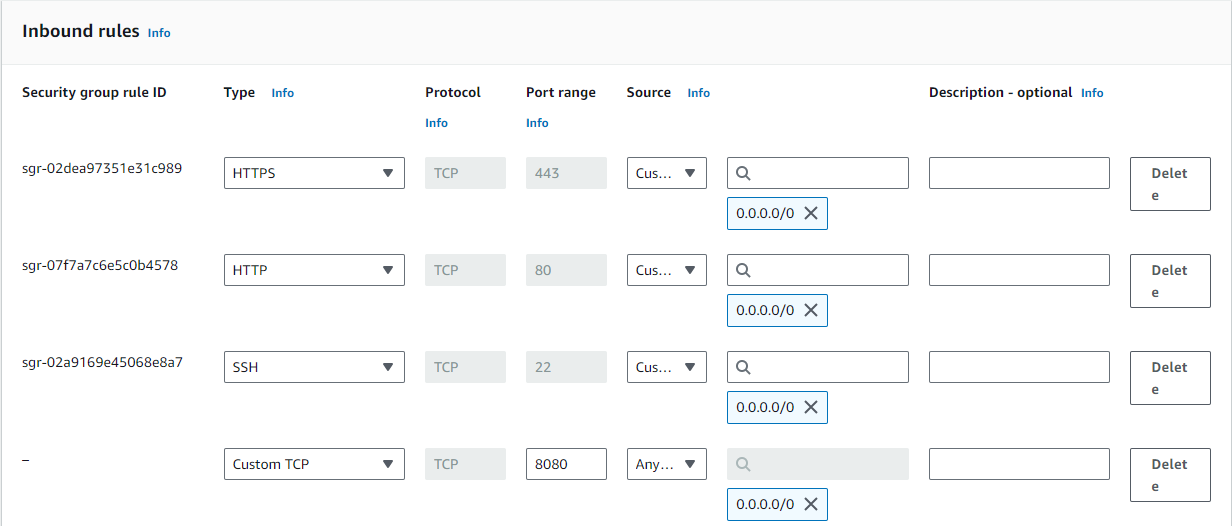
Now go to “Security Group” and edit inbound rules to allow inbound traffic on port 8080 for Jenkins.
Copy the public IP from the Instance details section.
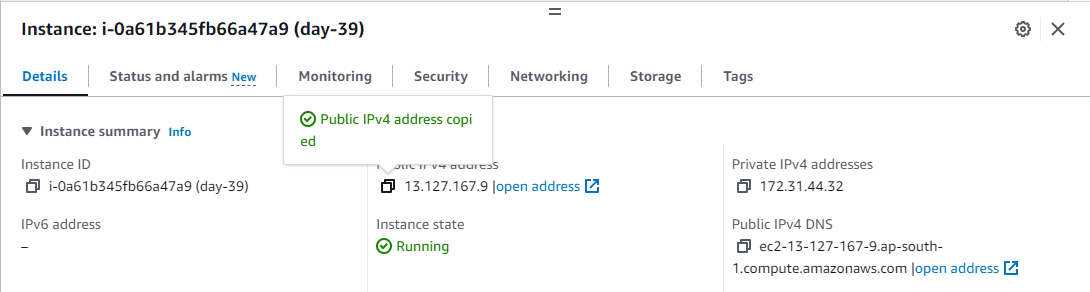
Enter Publicip:8080 on browser to see successful installation of jenkins.
Task2:
Read more on IAM Roles and explain the IAM Users, Groups and Roles in your own terms.
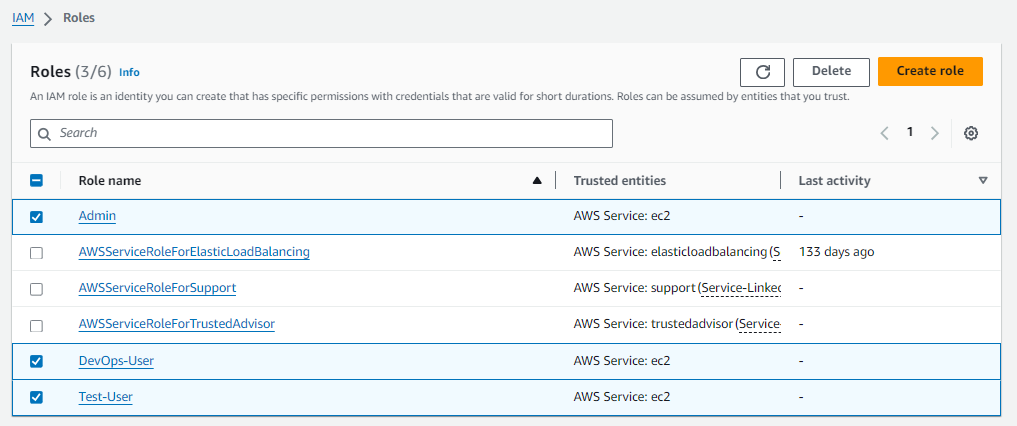
Create three Roles named: DevOps-User, Test-User and Admin.
IAM Roles play a pivotal role in managing access within AWS. Let's demystify IAM Users, Groups, and Roles in simpler terms:
IAM Users: These are individual entities with AWS account credentials, granting them access to AWS services.
IAM Groups: Groups are collections of users, streamlining permissions management by applying policies to multiple users at once.
IAM Roles: Roles define a set of permissions, not tied to a specific user, but assumed by entities like users, services, or AWS resources. This separation of permissions from users enhances security and scalability.
Now, let's create three roles as specified: DevOps-User, Test-User, and Admin, each tailored to their respective responsibilities within the AWS environment.
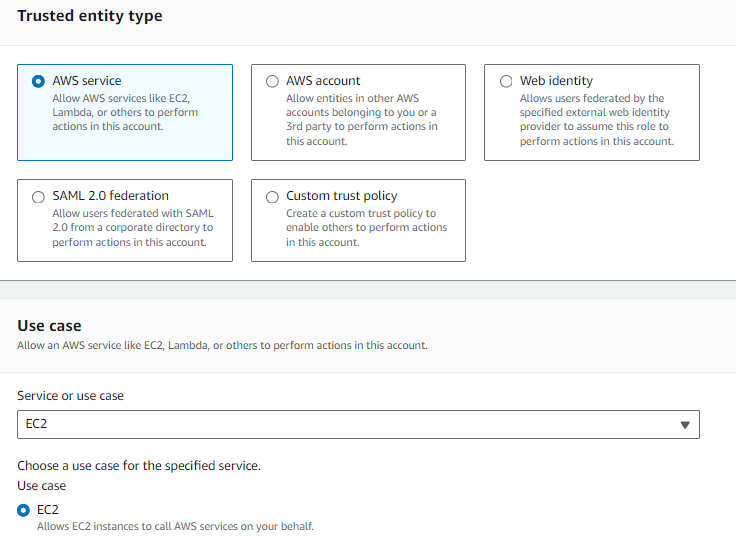
Navigate to “IAM Dashboard” and click on “Roles” in the left-hand menu and click on “Create Role”.

Now, choose “AWS service” and then “EC2”.
Choose the policy that defines the permissions for the role. For the DevOps-User role, choose the “AmazonEC2FullAccess” policy. Enter a name for the role and click “Create role”.

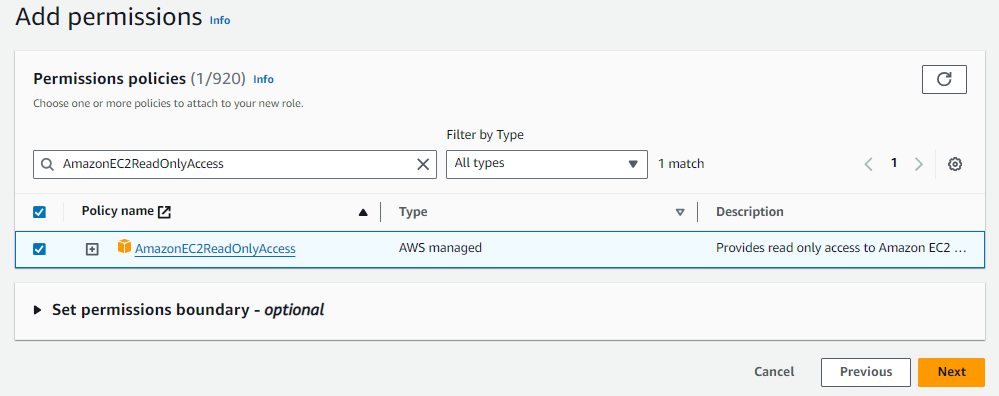
For the Test-User role, choose the “AmazonEC2ReadOnlyAccess” policy.
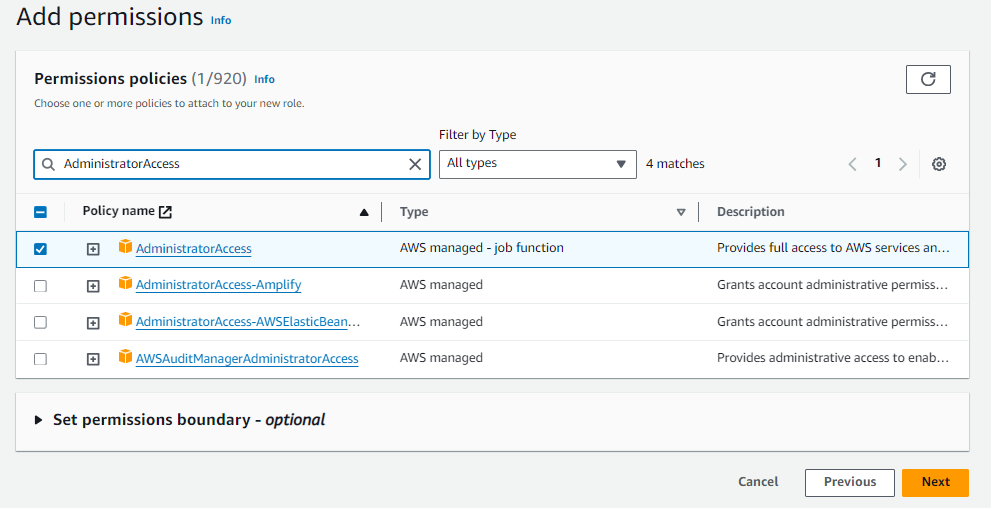
For the Admin role, choose the “AdministratorAccess” policy.
Once the roles are created, you can assign them to individual IAM users or groups as needed, and control their access to AWS resources.
By mastering AWS basics and IAM fundamentals, you pave the way for efficient cloud management and secure access control, unlocking the true potential of Amazon Web Services. Happy exploring! ☁️
I'm confident that this article will prove to be valuable, helping you discover new insights and learn something enriching .
thank you : )


