


In the realm of Kubernetes (k8s), managing storage is an essential part of ensuring data persistence and availability for applications. One powerful tool in this arena is Persistent Volumes (PVs), which provide a mechanism for storing data independently of Pods. In this guide, we'll explore how to integrate Persistent Volumes into a deployment, specifically focusing on a ToDo application.
Understanding Persistent Volumes in Kubernetes
Before diving into implementation, let's grasp the core concepts. A Persistent Volume (PV) in Kubernetes represents a piece of storage provisioned by the cluster's administrator. It exists independently of any Pod and has a lifecycle separate from Pods that use it. On the other hand, a Persistent Volume Claim (PVC) is a request for storage by a user or application within the cluster. The PVC binds to a PV, allowing Pods to access and use the storage as needed.
Now, let's move on to the tasks at hand:
Task 1: Adding a Persistent Volume to Your Deployment
Step 1: Create a Persistent Volume
We'll start by creating a Persistent Volume using a file on our node. Here's the YAML template for creating the PV:
apiVersion: v1
kind: PersistentVolume
metadata:
  name: pv-todo-app
spec:
  capacity:
    storage: 1Gi
  accessModes:
    - ReadWriteOnce
  persistentVolumeReclaimPolicy: Retain
  hostPath:
    path: "/tmp/data"
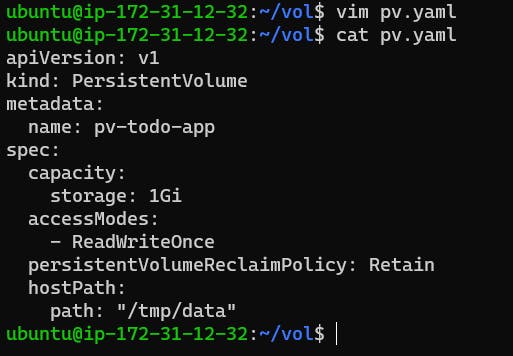
Apply this configuration using kubectl apply -f pv.yaml.

Step 2: Create a Persistent Volume Claim
Next, we'll create a PVC that references the PV we just created. Here's the PVC YAML template:
apiVersion: v1
kind: PersistentVolumeClaim
metadata:
  name: pvc-todo-app
spec:
  accessModes:
    - ReadWriteOnce
  resources:
    requests:
      storage: 500Mi
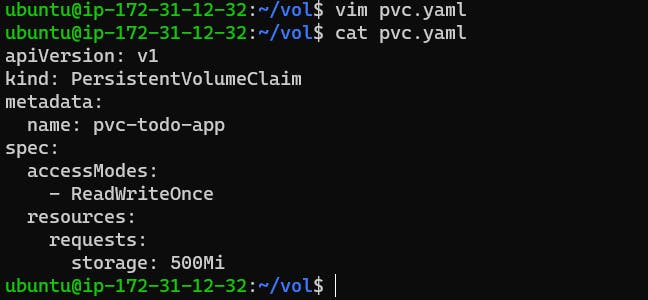
Apply this configuration using kubectl apply -f pvc.yaml.

Step 3: Update Your Deployment
Finally, update your deployment YAML file to include the Persistent Volume Claim. Here's how the updated deployment section should look:
yamlCopy codeapiVersion: apps/v1
kind: Deployment
metadata:
  name: todo-deployment
spec:
  replicas: 1
  selector:
    matchLabels:
      app: todo-app
  template:
    metadata:
      labels:
        app: todo-app
    spec:
      containers:
      - name: todo-app
        image: trainwithshubham/django-todo:latest
        ports:
        - containerPort: 8000
        volumeMounts:
          - name: todo-app-data-volume
            mountPath: /tmp/app/data
        volumes:
        - name: todo-app-data-volume
          persistentVolumeClaim:
            claimName: pvc-todo-app

Apply the updated deployment using kubectl apply -f deployment.yaml.

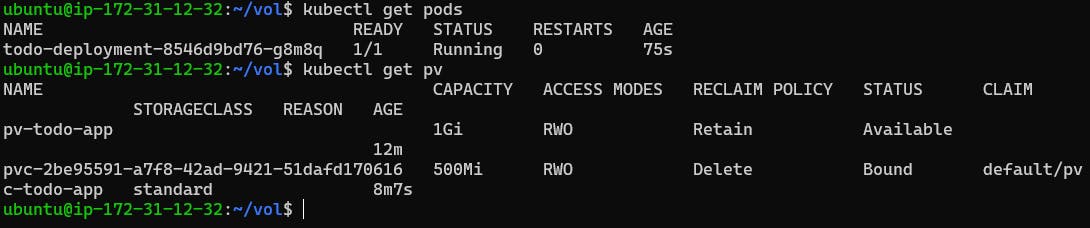
Step 4: Verification
Verify that the Persistent Volume has been added to your Deployment by checking the status of Pods and Persistent Volumes in your cluster:
kubectl get pods
kubectl get pv
Task 2: Accessing Data in the Persistent Volume
To access data stored in the Persistent Volume from within a Pod, follow these steps:
Connect to a Pod in your Deployment using the following command:
kubectl exec -it <pod-name> -- /bin/bashReplace
<pod-name>with the actual name of your Pod.
Once inside the Pod, navigate to the mounted path where the Persistent Volume is accessible. In our case, it's
/tmp/app/data.
Verify that you can access and manipulate data in this directory. You can create, read, update, or delete files as needed.
By completing these tasks, you've successfully integrated Persistent Volumes into your Kubernetes deployment, enabling data persistence and seamless access for your applications. Cheers to efficient storage management! 🚀
I'm confident that this article will prove to be valuable, helping you discover new insights and learn something enriching .
thank you : )