Day 26 : Jenkins Declarative Pipeline

In the realm of DevOps and continuous integration/continuous deployment (CI/CD), Jenkins stands as a stalwart tool empowering teams to streamline their software delivery pipelines. At the heart of Jenkins' power lies its Declarative Pipeline Syntax, a robust framework for defining and managing pipelines as code. Let's delve into what makes the Jenkins Declarative Pipeline so crucial in modern software development.
Unpacking Jenkins Pipeline
A pipeline, in Jenkins terminology, is essentially a set of interconnected steps or jobs arranged in a logical sequence. This sequence represents the flow of actions that code must pass through, from development to deployment and beyond.
Declarative vs. Scripted Pipeline
Jenkins initially introduced the Scripted Pipeline, a flexible DSL built with Groovy, allowing developers to define pipelines using imperative scripting. While effective, this approach had its complexities, often requiring a steep learning curve.
Enter the Declarative Pipeline, a newer and more refined implementation. Unlike the Scripted Pipeline's imperative nature, the Declarative Pipeline adopts a declarative syntax, offering a more structured and concise way to define pipelines as code.
Benefits of Using a Jenkins Pipeline
The pivotal advantage of leveraging Jenkins Pipeline lies in its "Pipeline-as-code" paradigm. This means that the pipeline's definition resides in a text file, commonly known as a Jenkinsfile, which can be versioned and managed alongside the project's source code. Here's why this approach is invaluable:
Versioned Pipeline Configuration: By storing pipeline configurations in source control, teams can track changes, roll back to previous versions, and collaborate seamlessly.
Automated Pipeline Generation: Jenkins automatically creates pipeline build processes for all branches and pull requests, reducing manual intervention and ensuring consistency across environments.
Unified Code Review: Treating the pipeline as code enables comprehensive code review and iteration alongside the application's codebase, promoting quality and best practices.
Exploring Declarative Pipeline Syntax
Let's take a glimpse into the structure of a basic Declarative Pipeline using a simplified example:
pipeline {
    agent any
    stages {
        stage('Build') {
            steps {
                // Build steps here
            }
        }
        stage('Test') {
            steps {
                // Test steps here
            }
        }
        stage('Deploy') {
            steps {
                // Deployment steps here
            }
        }
    }
}
In this example:
pipeline: Defines the pipeline block.agent any: Specifies the agent or executor to run the pipeline.stages: Divides the pipeline into distinct stages such as build, test, and deploy.steps: Contains the specific actions or tasks to be executed within each stage.
Putting It Into Practice
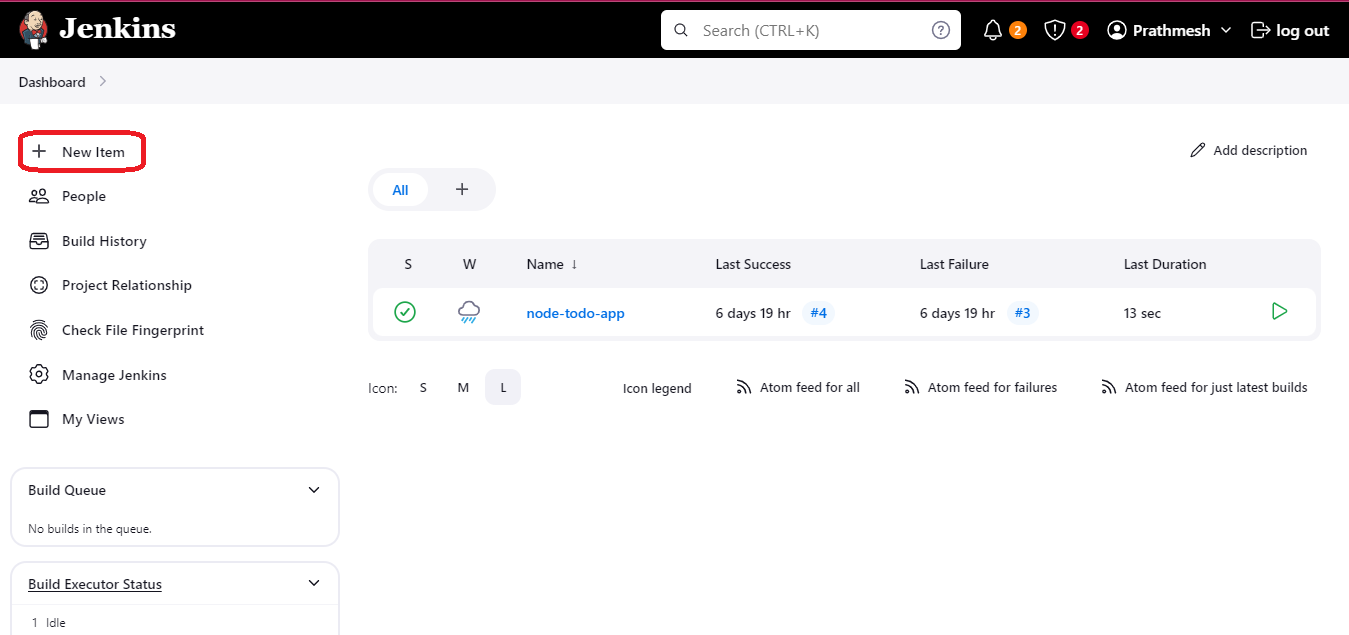
Task 01: Creating a Jenkins Pipeline Job
Login to the Jenkins server and click on “New Item” to create a job.
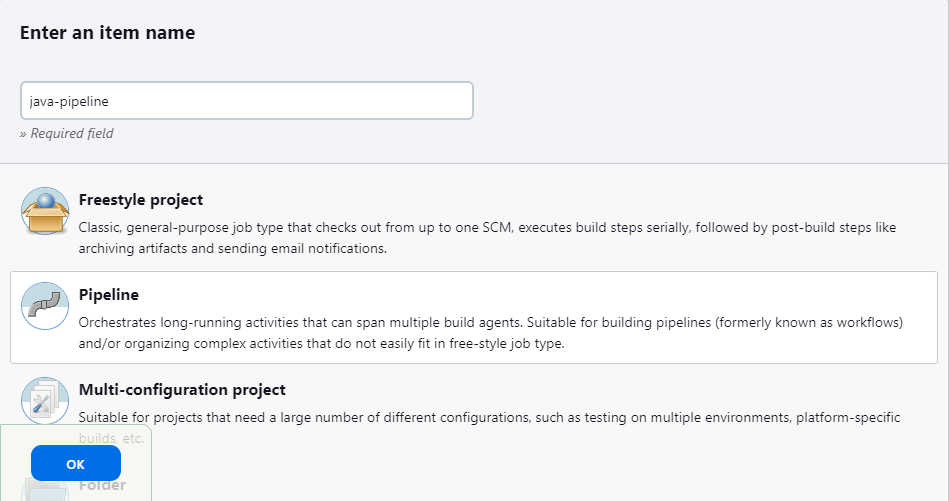
Enter the desired name, select “Pipeline” and then click on Ok.
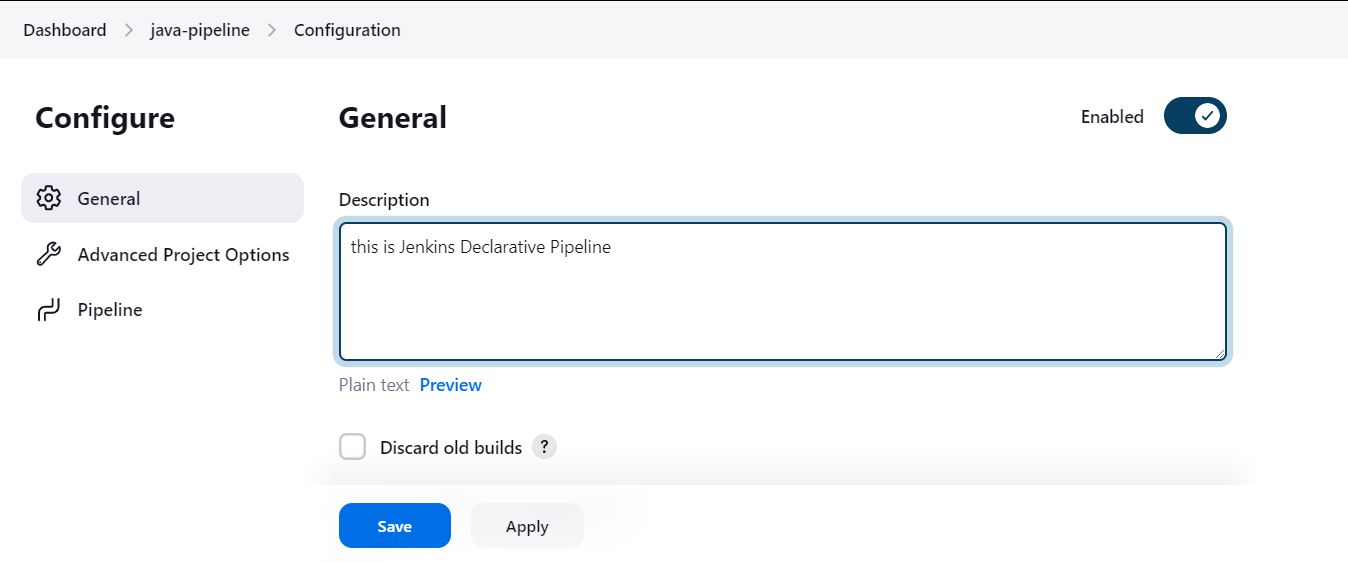
In General, give the description for the job. Scroll down and in the “Pipeline” section.
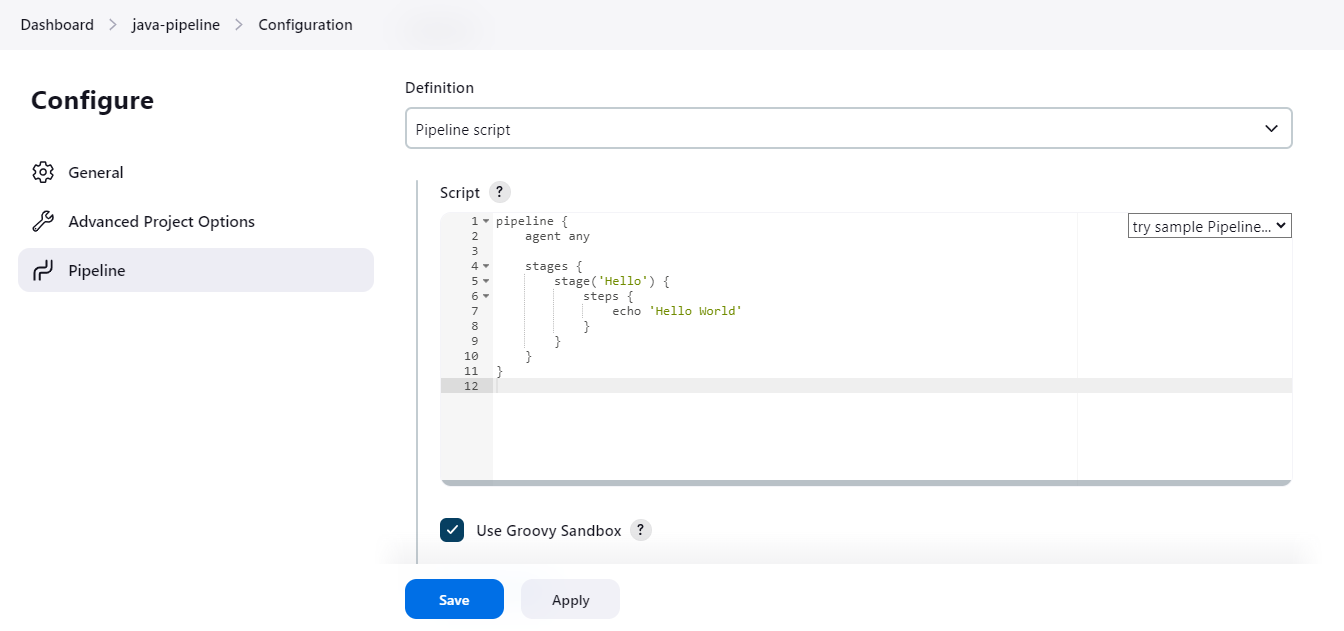
In the definition select Pipeline script, start typing the code for building a pipeline, and click on the Save button.
Click on “Build Now” and the job will be built successfully.
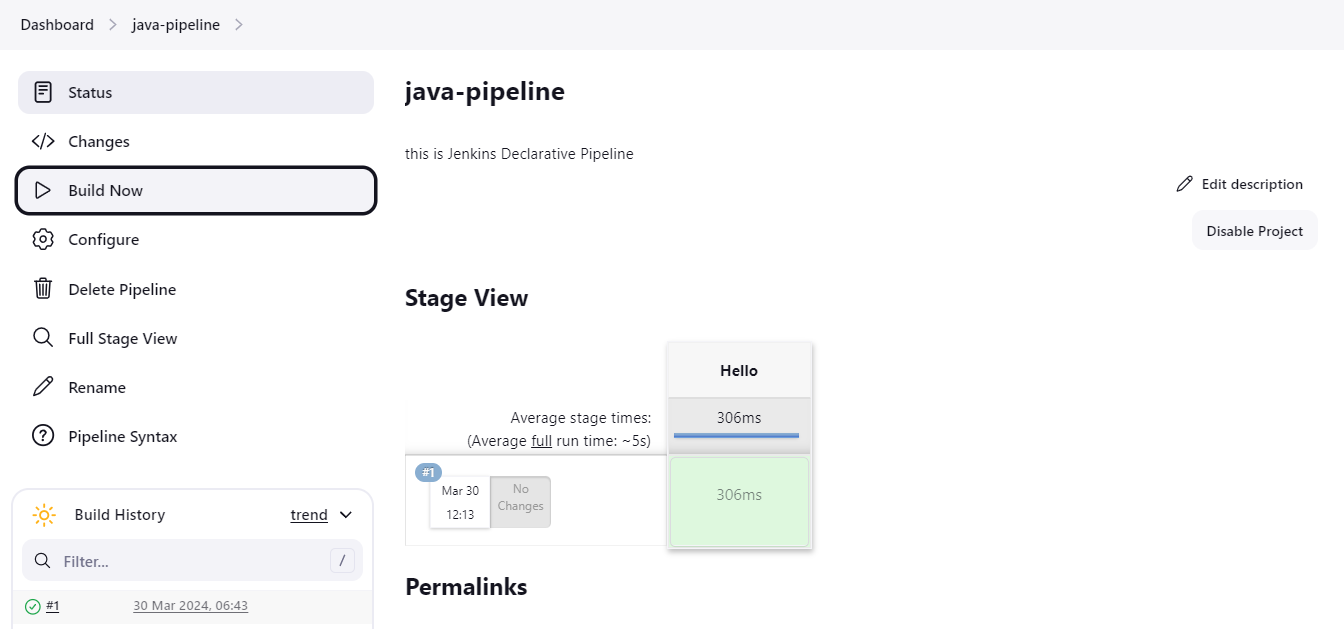
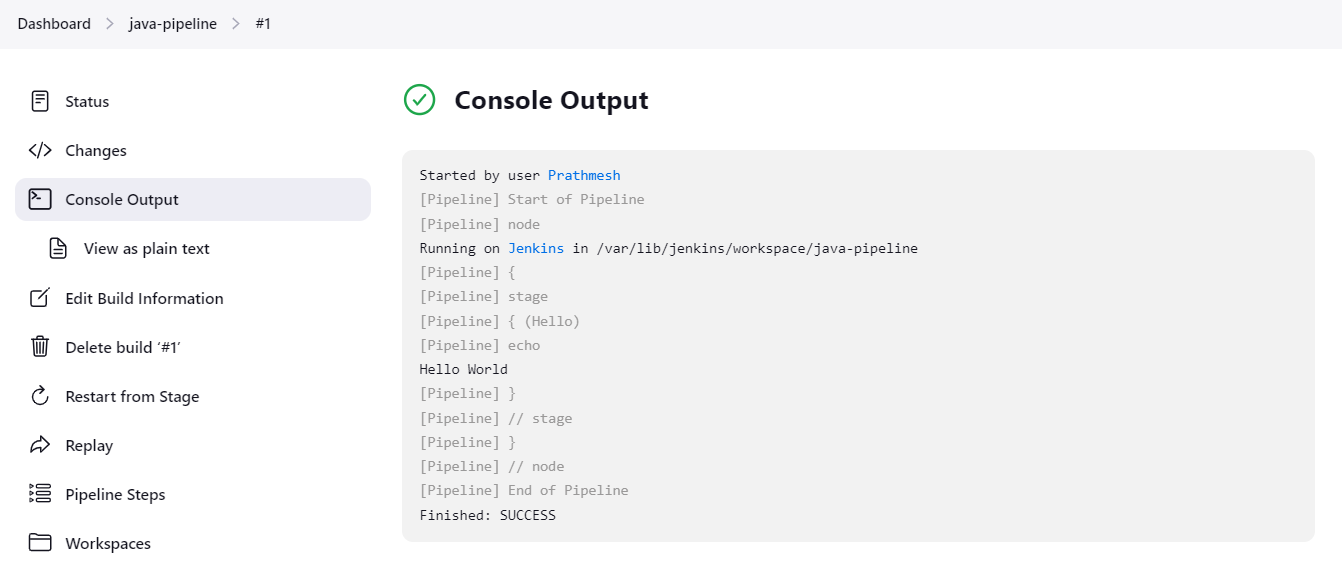
After a build is completed, you can view the console output on the build page.
Complete the example using the Declarative pipeline
Login to your Jenkins and Install the Docker Pipeline plugin through the Manage Jenkins > Manage Plugins page.
After installing the docker pipeline plugin click on “New Item”.
Enter the desired name, select “Pipeline” and then click on Ok.
In general give the description for the job. Scroll down and in the “Pipeline” section and in the definition select Pipeline script, start typing the code for building a pipeline, and click on the Save button.
Jenkinsfile (Declarative Pipeline)
 /* Requires the Docker Pipeline plugin */
 pipeline {
     agent { docker { image 'node:20.11.1-alpine3.19' } }
     stages {
         stage('build') {
             steps {
                 sh 'node --version'
             }
         }
     }
 }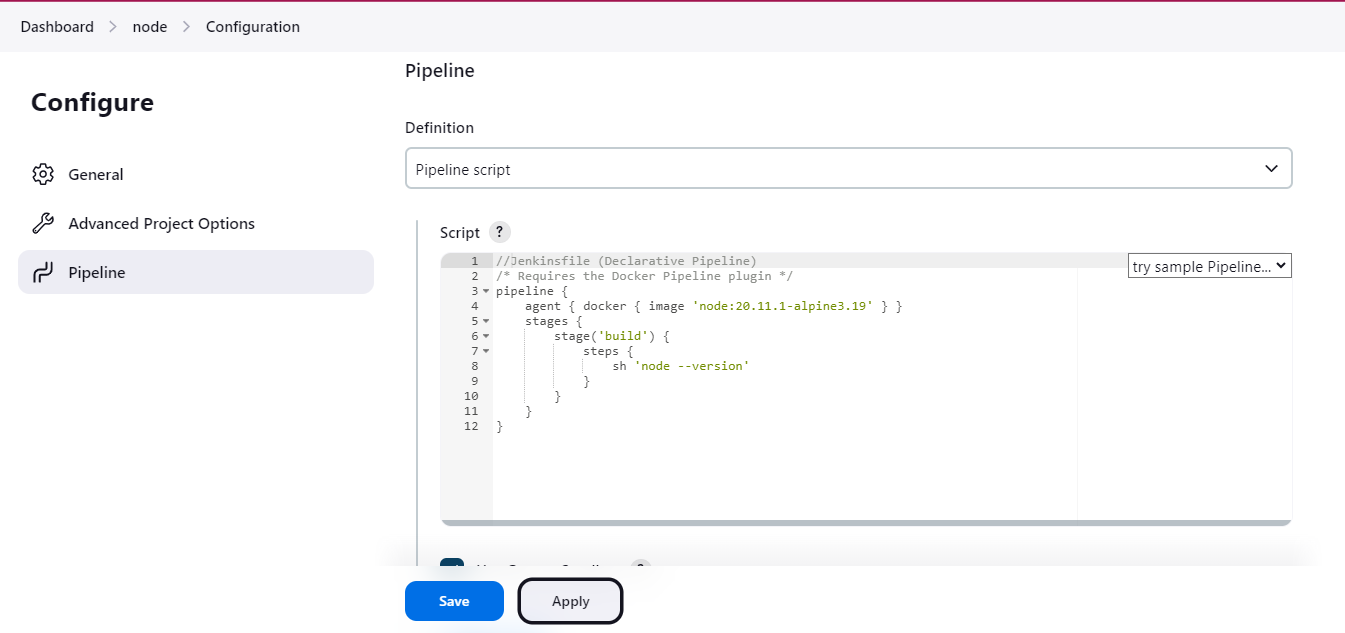
Click on “Build Now” and the job will be built successfully.
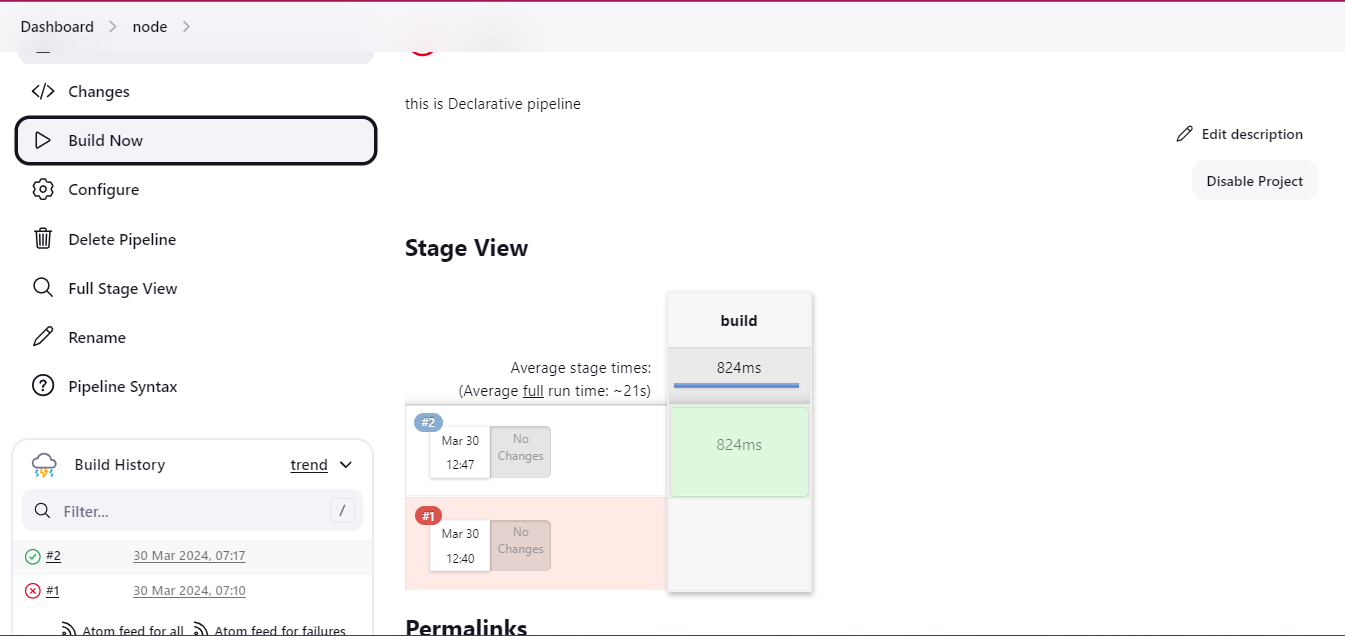
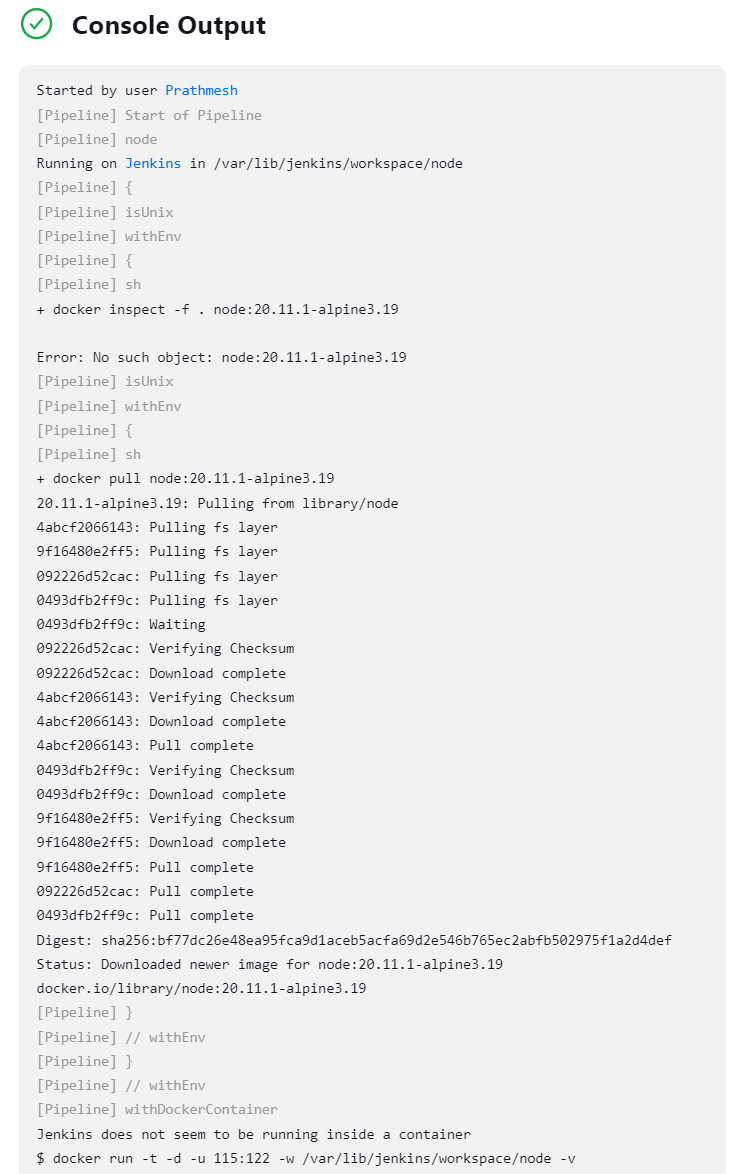
After a build is completed, you can view the console output in the build page.
By following these steps, you'll embark on a journey towards harnessing the full potential of Jenkins Declarative Pipeline, transforming your CI/CD workflows into streamlined, automated pipelines driven by code.
Conclusion :
The Jenkins Declarative Pipeline serves as the backbone of modern CI/CD practices, offering a structured, version-controlled approach to defining and managing pipelines. Embracing this methodology empowers teams to accelerate software delivery, enhance collaboration, and maintain agility in today's fast-paced development landscape.
I'm confident that this article will prove to be valuable, helping you discover new insights and learn something enriching .
thank you : )


